

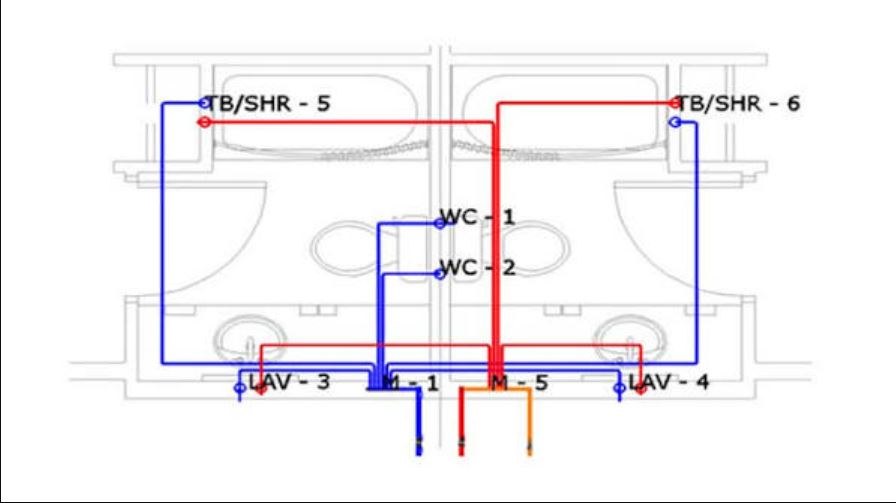
Estimating how much PEX pipe you need is an important step in planning a plumbing project. Buying too little can delay the work, while buying too much can waste money and leave you with unused materials.
The amount of PEX tubing required depends on the home’s layout, the distance between fixtures and the water supply, the pipe routing, and the type of plumbing system being installed. You should also allow for extra tubing to account for bends, routing changes, and cutting waste.
A simple estimate can help you prepare a material list, compare contractor quotes, and plan your plumbing budget before work begins.
What Determines How Much PEX Pipe You Need?
There is no single pipe length that works for every home. Two houses with the same floor area may need different amounts of tubing because their plumbing layouts differ.
Before estimating your materials, consider these factors:
- Number of fixtures: Bathrooms, kitchens, laundry rooms, and other water outlets affect the number and length of supply lines.
- Distance from the water source: Fixtures farther from the manifold or main supply may require longer pipe runs.
- Pipe routing: Tubing routed through walls, ceilings, crawl spaces, or floors may need more length than a direct measurement suggests.
- Plumbing design: A manifold system may use separate lines to individual fixtures, while a trunk-and-branch system uses a main line with smaller branches.
- Pipe diameter: Different sections may require different pipe sizes based on flow requirements and plumbing codes.
- Waste allowance: Cutting, routing changes, and installation conditions can increase the amount of tubing needed.
A good estimate starts with the actual plumbing layout rather than the home’s total square footage alone.
Step 1: Choose the Plumbing Layout
The first step is to understand how water will travel through your plumbing system.
Manifold System
A manifold system distributes water through separate lines from a central distribution point. Each fixture or fixture group may have its own dedicated line, depending on the design.
This layout can make it easier to isolate individual lines for maintenance. However, it may require more total tubing because several lines run separately from the manifold to their destinations.
Trunk-and-Branch System
A trunk-and-branch system uses a larger main supply line with smaller branches serving individual fixtures or groups of fixtures.
This arrangement can reduce the amount of tubing needed in some layouts. However, pipe sizing, pressure loss, and fixture demand must be considered when designing the system.
The best layout depends on the home’s design, fixture locations, water demand, and applicable plumbing requirements.
Step 2: Measure Each Pipe Run
Once you know the layout, measure the distance between the starting point and each fixture or connection.
For example, you may need to measure the routes from the manifold or supply line to:
- Kitchen sink
- Bathroom sink
- Shower or bathtub
- Toilet
- Washing machine
- Dishwasher
- Outdoor hose connection, where PEX is permitted and appropriately protected
Measure the intended route, not just the straight-line distance between two points. Pipes often travel around framing, through joists, and along walls before reaching a fixture.
If a line passes through several rooms or floors, divide it into smaller sections and add the measurements together.
A simple worksheet can help organize the estimate.
| Pipe Run | Measured Length | Extra Length | Estimated Total |
|---|---|---|---|
| Manifold to kitchen sink | 25 ft | 3 ft | 28 ft |
| Manifold to bathroom sink | 30 ft | 4 ft | 34 ft |
| Manifold to shower | 35 ft | 4 ft | 39 ft |
| Manifold to washing machine | 20 ft | 3 ft | 23 ft |
| Total | 110 ft | 14 ft | 124 ft |
These figures are illustrative. Your actual measurements will depend on the home’s layout and the route selected by the installer.
Also, this example represents four individual runs. It does not include every pipe needed for a complete home plumbing system.
Step 3: Calculate the Total Pipe Length
Add the measured length of every pipe run to determine the base requirement.
The basic formula is:
Base pipe length = Sum of all measured pipe runs
Using the example above:
25 + 30 + 35 + 20 = 110 feet
The base estimate is 110 feet. However, this figure does not include the extra material needed for routing adjustments, cutting, and installation.
For a more useful purchasing estimate, calculate an additional allowance.
Step 4: Add a Waste Allowance
A waste allowance provides extra tubing for cuts, bends, measurement differences, and minor routing changes.
For a straightforward project, an allowance of around 10% may be a reasonable starting estimate. Complex layouts may need more, while carefully measured projects may need less.
The appropriate allowance depends on the installation. It should not replace accurate measurements or a plumber’s material takeoff.
For example, if your measured requirement is 110 feet and you add a 10% allowance:
110 × 0.10 = 11 feet
Then:
110 + 11 = 121 feet
Your estimated requirement is 121 feet.
In practice, you may purchase the next suitable coil or combination of standard lengths above your calculated requirement. Check the manufacturer’s packaging for available coil lengths.
Step 5: Account for the Main Supply and Connections
A pipe estimate should include more than the distance between fixtures.
Depending on the design, you may also need tubing for connections to the water heater, manifold, main supply, shutoff valves, and other parts of the system.
However, do not add these lengths twice. If your original measurements already include the full route from the supply point to each fixture, those sections are already accounted for.
Your material list may also include:
- Approved PEX fittings and adapters
- Manifold and valves, if required
- Pipe supports and protective plates
- Insulation for vulnerable pipe sections
- Approved transition fittings
- Crimp rings, clamps, or other compatible connection components
- Tools required by the selected fitting system
Choose compatible components approved for the tubing and application. Follow the manufacturer’s installation instructions and local plumbing codes.
Step 6: Select the Correct PEX Pipe Size
Pipe length is only one part of the estimate. You must also determine the appropriate diameter for each section.
Common nominal PEX sizes include 3/8-inch, 1/2-inch, 3/4-inch, and 1-inch tubing. Their suitability depends on the intended application and the plumbing design.
Smaller lines may serve individual fixtures, while larger lines may supply several fixtures or carry water through main distribution sections. These are general patterns, not universal sizing rules.
Pipe sizing should account for:
- Number and type of fixtures
- Expected water demand
- Available supply pressure
- Pipe length and friction loss
- Fittings and valves
- Local plumbing code requirements
An undersized pipe can restrict flow when multiple fixtures operate at the same time. An oversized pipe may add unnecessary material costs and can affect water delivery characteristics.
For more background on pipe types and their residential applications, see this guide to PEX plumbing.
Step 7: Estimate the Cost of PEX Tubing
Once you know the estimated length and required diameters, you can calculate the material cost.
Use this formula:
Estimated tubing cost = Total required length × Price per foot
For example, assume a project needs 250 feet of tubing and the selected product costs $0.50 per foot.
250 × $0.50 = $125
The estimated tubing cost is $125.
This is an example calculation, not a current market quote. Actual prices vary by pipe size, product type, manufacturer, retailer, and location.
The total plumbing budget will also need to account for fittings, valves, tools, insulation, labor, permits, and any repairs required to access existing pipes.
When comparing prices, make sure you are comparing the same diameter and product type. The lowest price per foot does not always represent the lowest total project cost.
A Practical PEX Pipe Estimation Example
Consider a homeowner planning a small plumbing upgrade with six supply runs.
| Pipe Run | Estimated Length |
|---|---|
| Kitchen sink | 25 ft |
| Bathroom sink | 20 ft |
| Shower | 35 ft |
| Toilet | 25 ft |
| Washing machine | 30 ft |
| Dishwasher | 15 ft |
| Base total | 150 ft |
Assume the installer adds a 10% allowance for waste and routing adjustments.
150 × 0.10 = 15 feet
150 + 15 = 165 feet
The initial estimate is therefore 165 feet of tubing.
Before buying materials, confirm that the six measurements reflect the actual routing and that the estimate includes any required supply connections. The project may also need different diameters, so the full 165 feet should not automatically be purchased as one pipe size.
Common Mistakes When Estimating PEX Pipe
Avoid these mistakes when planning a plumbing project.
Using the home’s square footage as the only measurement. Floor area does not tell you the length of every supply line. Measure the actual pipe routes.
Forgetting vertical runs. Pipes may travel between floors or through wall cavities. Include those distances in the measurements.
Adding too much waste allowance. A large allowance can inflate the budget unnecessarily. Measure carefully and choose an allowance based on the project’s complexity.
Ignoring pipe diameter. A correct total length does not guarantee that the pipe sizes are suitable for the water demand.
Forgetting fittings and valves. Tubing is only one part of a complete plumbing material list.
Buying incompatible components. PEX tubing, fittings, and connection tools must be compatible with the selected system.
Ignoring local code requirements. Approved materials, installation methods, and support requirements can vary by jurisdiction.
Frequently Asked Questions
How much PEX pipe do I need for a house?
The amount depends on the number of fixtures, the plumbing layout, pipe routing, and the size of the home. Measure each pipe run, add the lengths together, and include a suitable allowance for waste and routing changes. A full repiping project should be measured using the actual plumbing plan.
How much extra PEX pipe should I buy?
A 10% allowance can be a useful starting point for a straightforward, well-measured project. Complex routes or uncertain measurements may require a different allowance. Avoid using a fixed percentage as a substitute for a proper material takeoff.
Can I estimate PEX pipe by square footage?
Square footage alone is not a reliable way to calculate pipe requirements. Two homes of equal size may have different fixture counts and plumbing layouts. Measure the routes from the supply point to the intended fixtures.
Does PEX pipe size affect the total cost?
Yes. Larger-diameter tubing generally costs more per foot than smaller tubing. The correct size also depends on flow requirements, pipe length, available pressure, and code requirements.
Should I buy PEX pipe in coils or straight lengths?
Flexible PEX is commonly available in coils, which can be useful for longer continuous runs. The best option depends on the required length, installation layout, product availability, and fitting system. Compare the available package lengths with your material estimate before purchasing.
Final Thoughts
Estimating PEX pipe requirements starts with a clear plumbing layout and accurate measurements. Measure each run, include supply connections, calculate the base length, and add a reasonable allowance for cutting and routing changes.
Then determine the correct pipe diameter for each section and account for fittings, valves, insulation, and labor in the project budget.
A careful estimate can reduce material waste and help prevent delays. For a major renovation or whole-house repiping project, have a qualified plumber verify the measurements, pipe sizes, and installation requirements before you order materials.
